
DataMonsters: Power Apps, Blobs and Power BI Pt.1

Little Data Monsters
Microsoft has released ~270 offerings and services in the Azure stack and 3 stellar platforms for the PowerPlatform stack. As highly configurable as they are, it would be impossible to learn every interaction between both stacks.
The Azure Stack is filled to the brim with products and features. Azure functions, data-warehouses, data lakes, blob storage, table storage etc etc…
The PowerPlatform stack is just as comprehensive, perhaps there aren’t as many products, but inside PBI, PowerAutomate and PowerApps there is a nearly endless set of inter-configurations, or DataMonsters.

I paid a dollar for a ‘clickbait’ image based on the azure stack…

This one was $10!!
In this blog I want to showcase how we can tie Power Automate, Azure Blob Storage and Power BI all together.
The general use case of this solutions is this:

You are responsible for the collection of data from an unruly set of vendors. You want to make a vendor facing portal like this one that allows vendors to upload files and automatically have them submitted to an approval process. Once approved they need to be added to the reporting dataset.
Check out the video here>> or at the bottom of the page if you’d prefer that format.
This DataMonster is broken into two parts, Azure and the PowerApp Pt. 1 and Power Automate and The PowerBI Pt. 2.
Benefits of using this DataMonster

Good Cross-Platform Documentation:
Typically all the PowerPlatforms have got stellar documentation. The Azure Stack pretty stellar as well for documentation.

Intended Integration:
Instead of hoping that your two technologies will work together, we can assume that Microsoft has our back. There is a HUGE compatibility push happening internally on the Microsoft BI stack.

Ease of Use for End Users:
Imagine a solution where both parties have a maximum of 4 clicks on either side for the whole interaction. That’s the future single stack integrations can provide.
Overview:
The general overview is this.
PowerApps:
Data is uploaded to PowerApps
Data is then sent to an ‘unapproved’ blob storage location
PowerAutomate:
A flow is monitoring the ‘unapproved’ folder for new files
When a new file is found, an approvals process is started
If the the file is approved, it’s moved to the ‘approved’ folder
If the file is declined, the original uploaded is notified why their file was rejected
PowerBI
PowerAutomate sends a request to refresh the PowerBI dataset
There are a lot of niggly bits in between, but I’ll do my best to cover them.
Something important to note is that the collection, storage and display can all be replaced with the following, un-comprehensive list of alternatives:
Collection:
E-Mail sinkhole
Proprietary software or front end
Microsoft Forms
Storage:
Sharepoint Lists
Sharepoint File Structures
Onedrive
Azure Table Storage
SQL server
Display:
Excel
Any custom front end
Tableau
The Storage:
I think it’s easier to start with the blob storage.
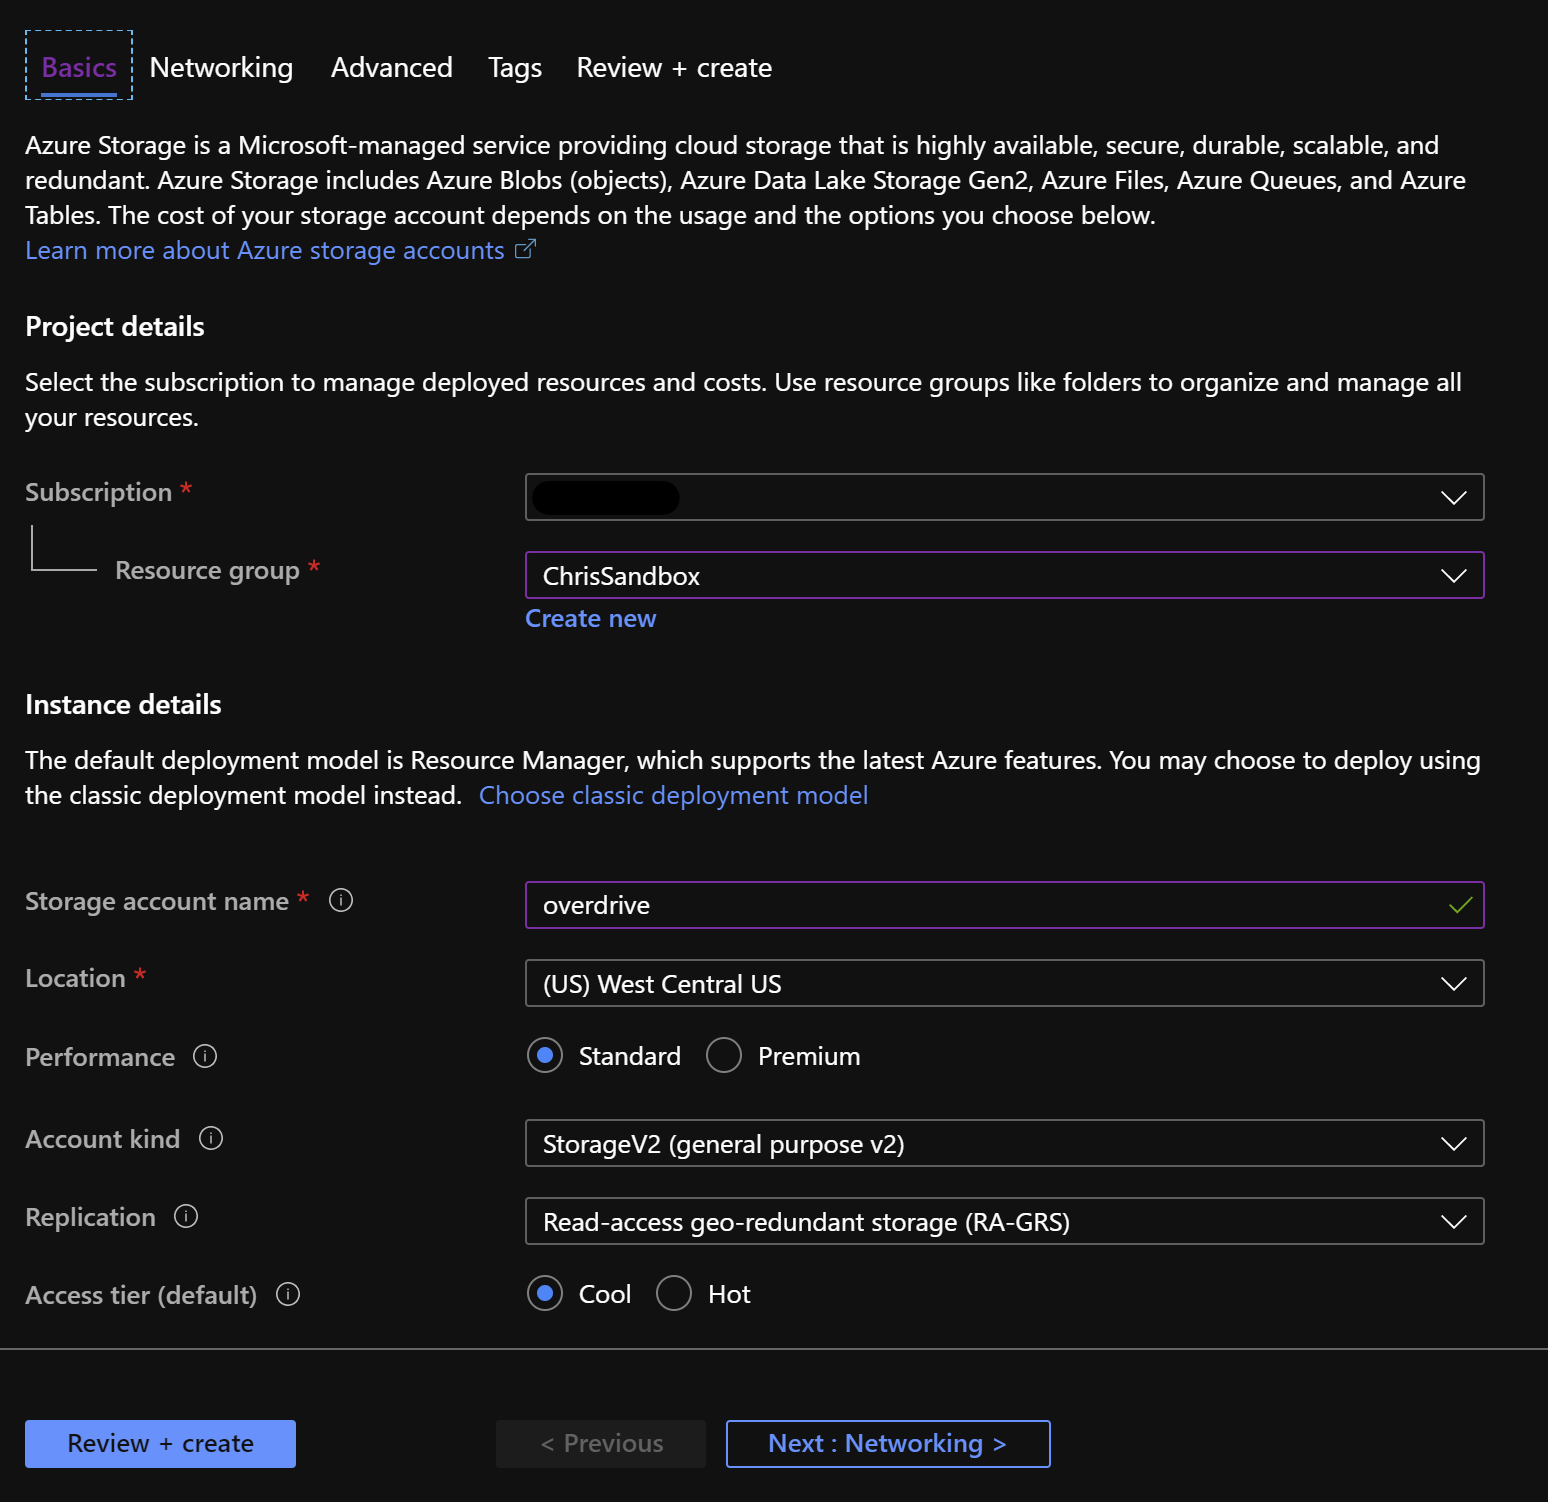
Set up a new storage account or use an existing one, the images show how I set mine up.
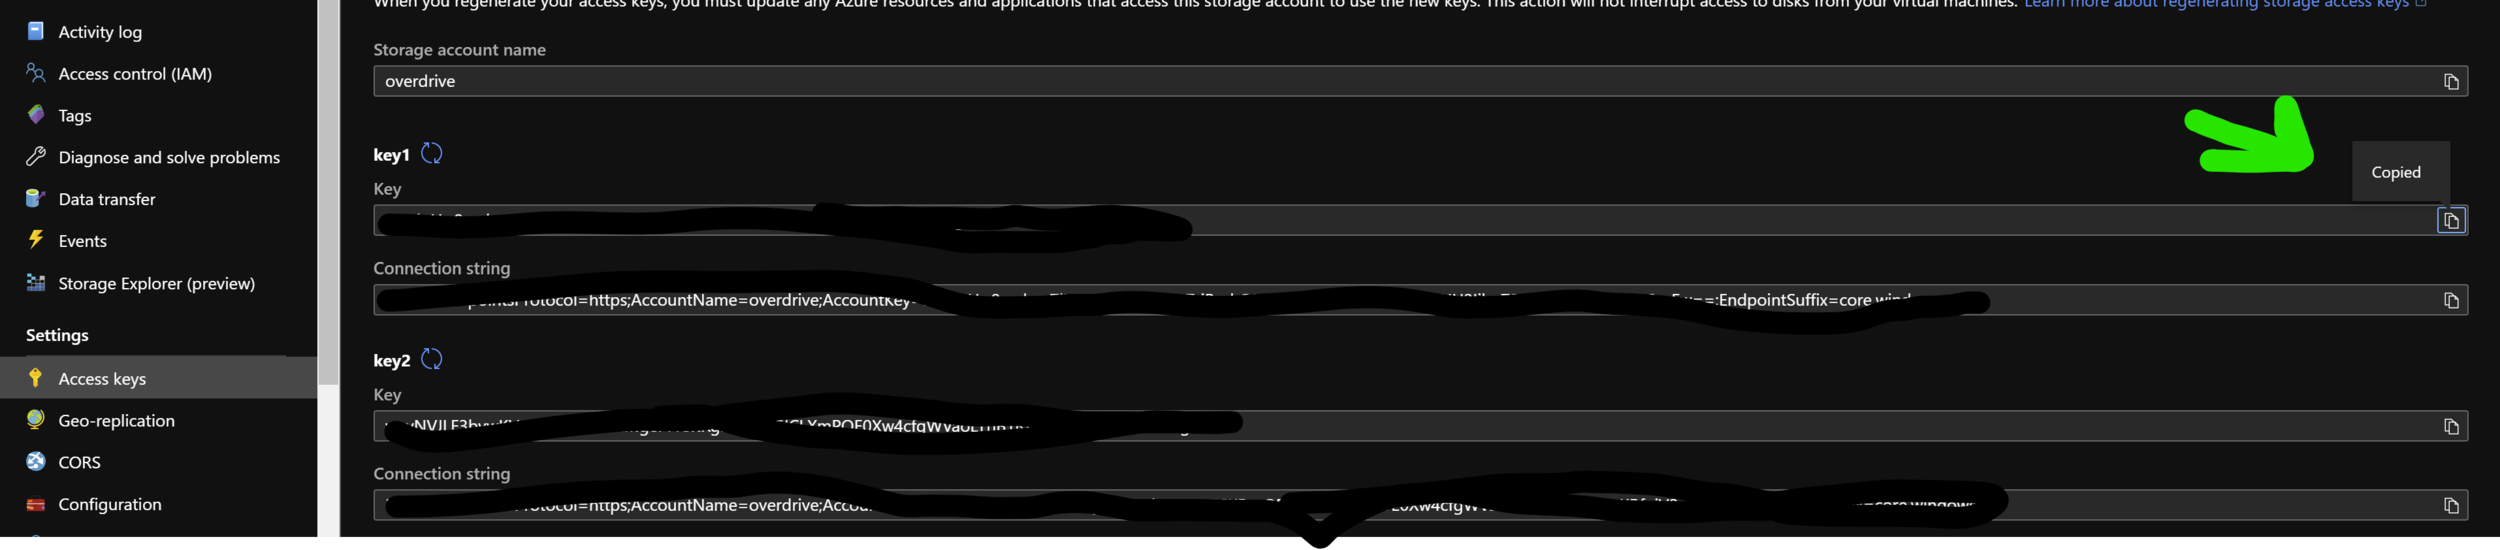
Next collect the storage account key
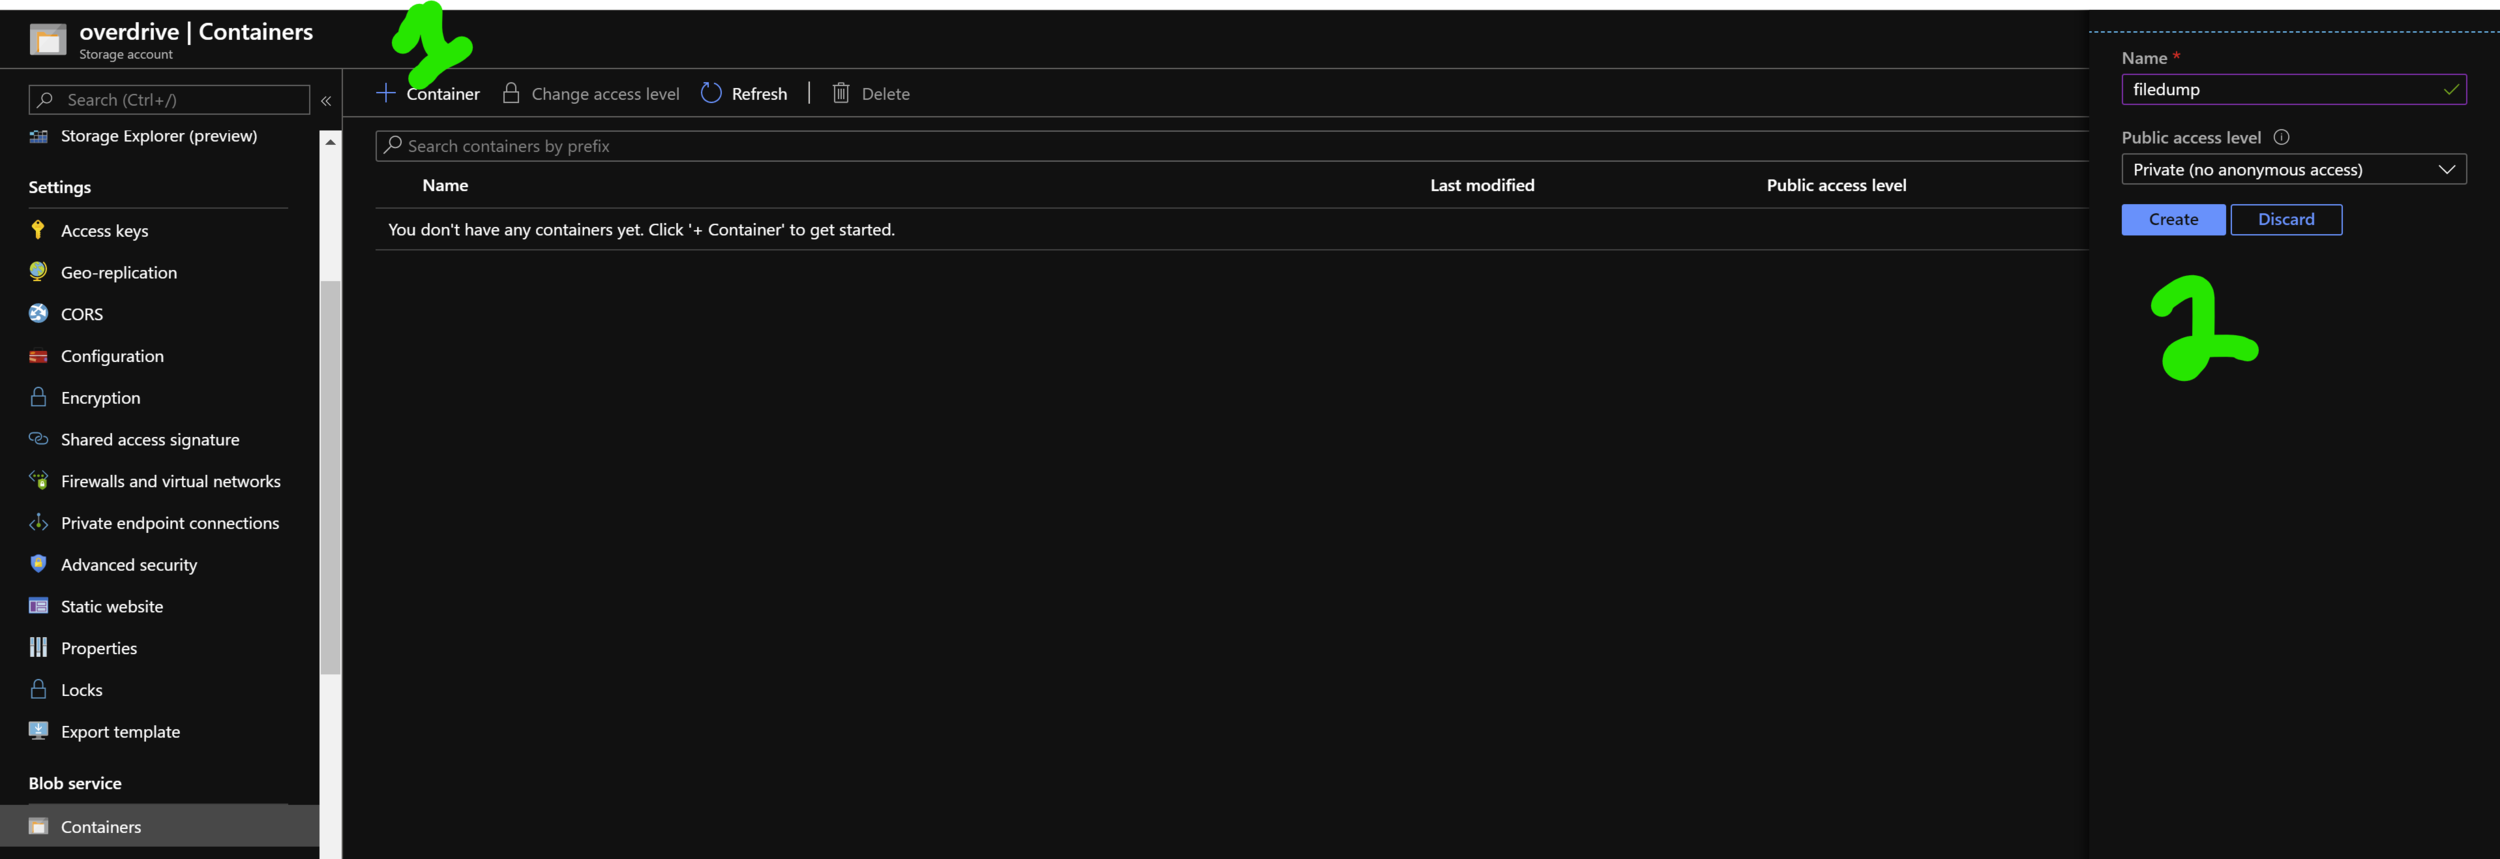
Finally make a container, I called mine filedump.
The PowerApp:
We love PowerApps. The barrier to entry is tiny for creation and user interaction. Endlessly configurable and already in the O365 ecosystem?? Sounds perfect.
Ok this section is going to be a slog. Feel free to just download the file and import it. Here>>
Go to https://make.powerapps.com
We’ll go step-by-step, each bullet point will correspond to a screenshot.
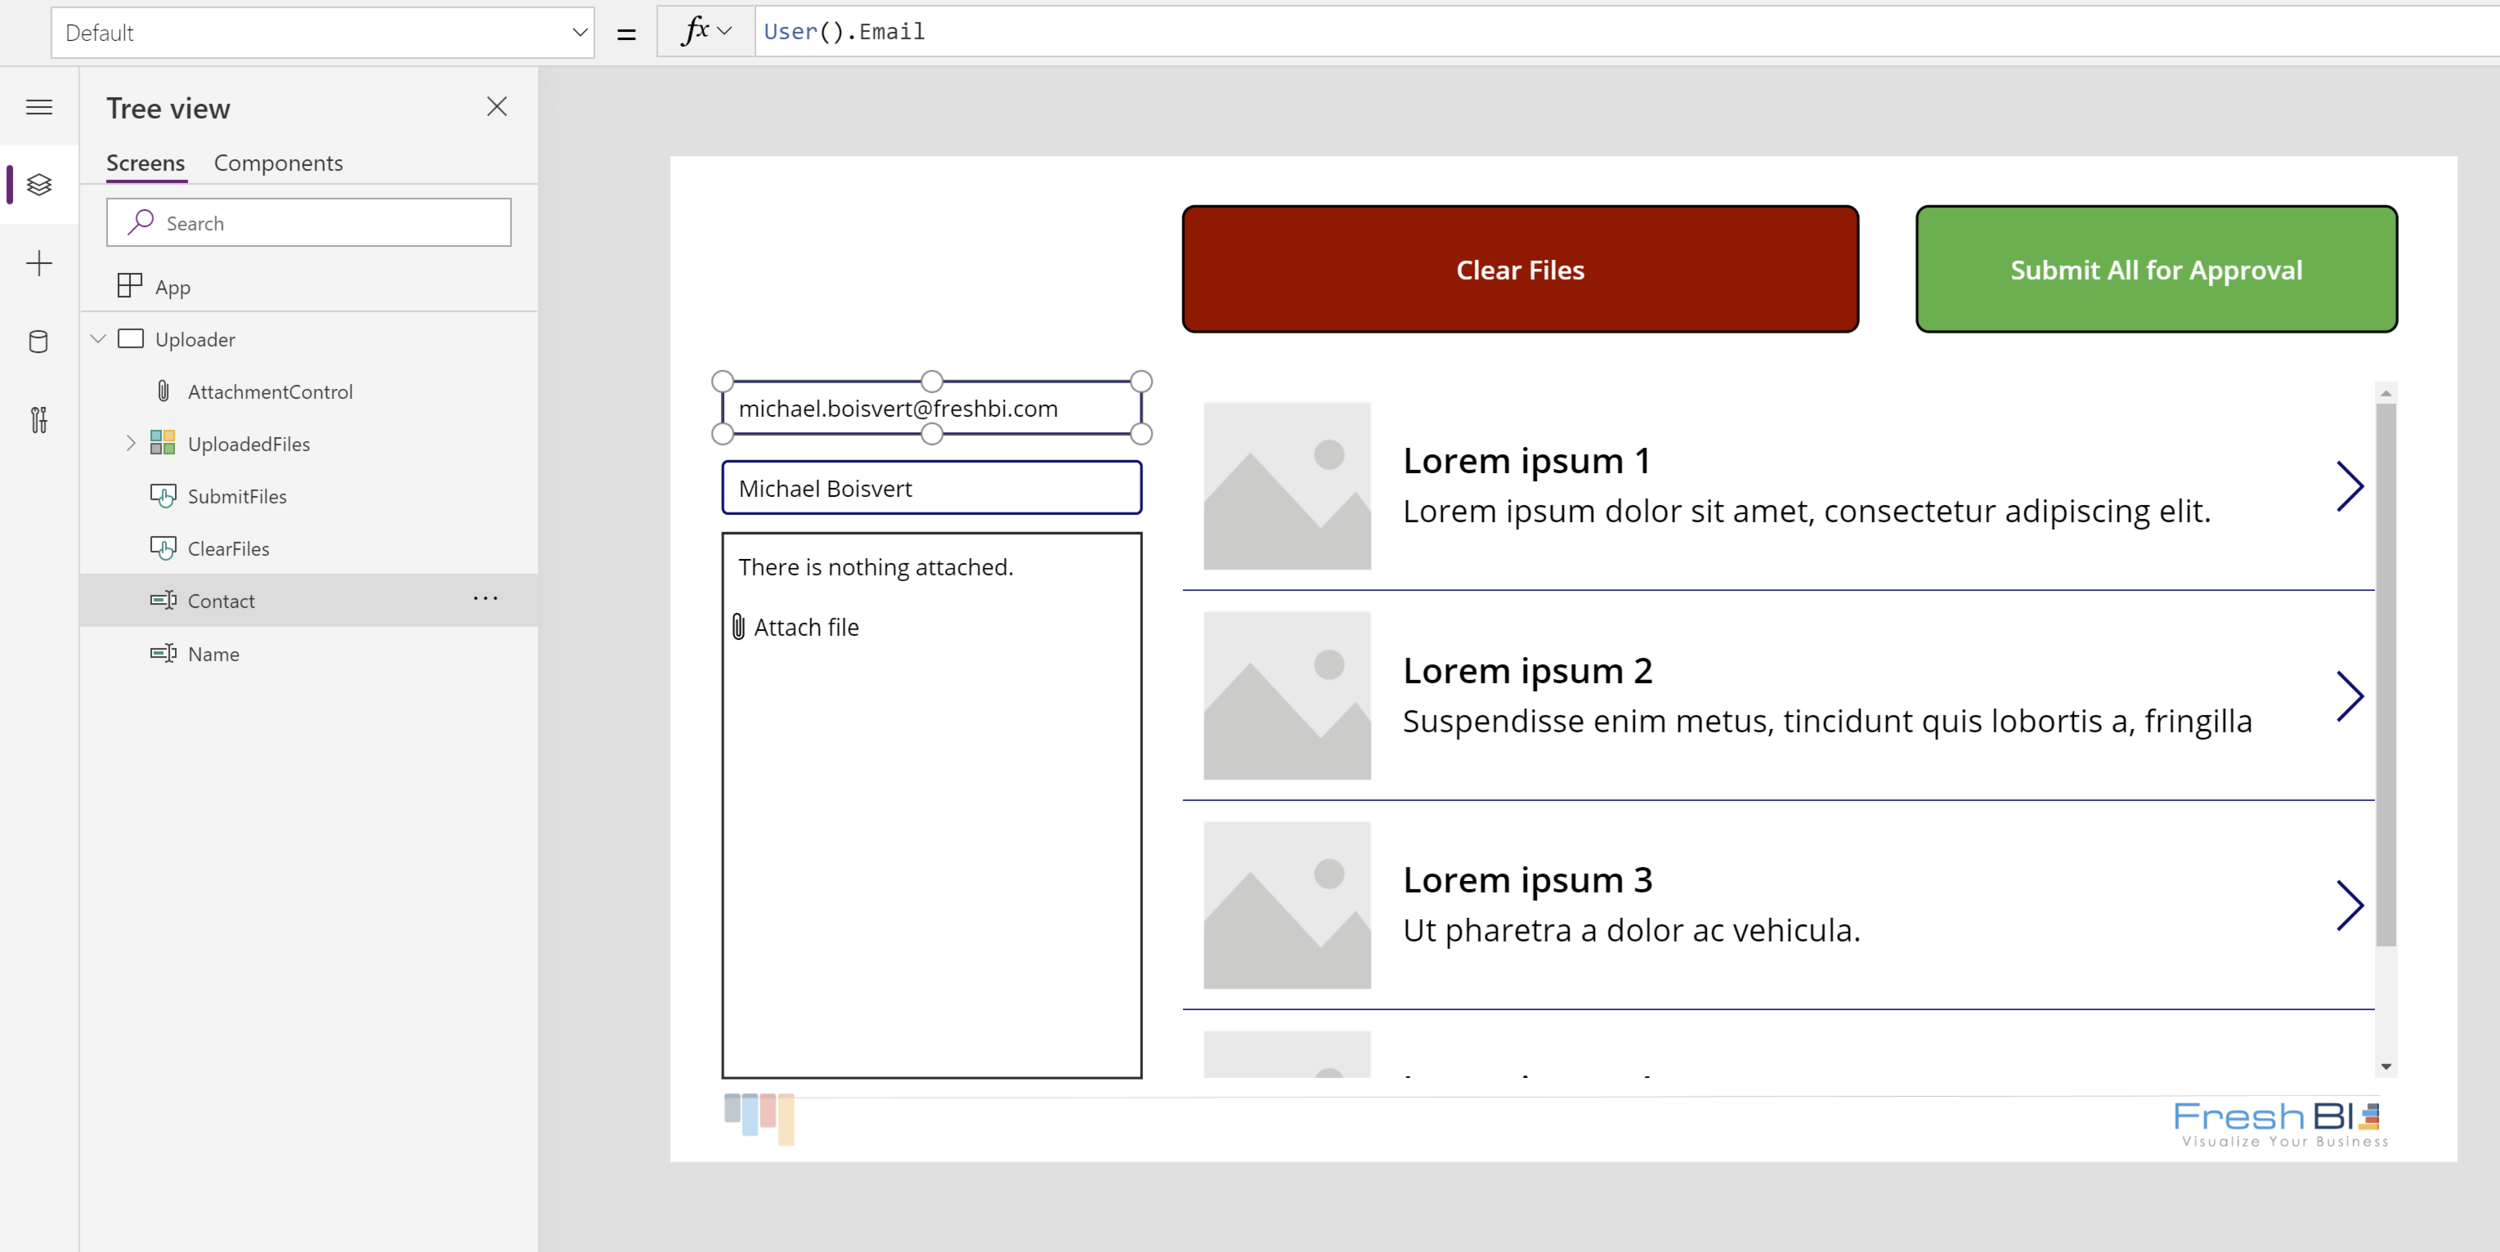
I dropped in a Background, Two Text Inputs, Two Buttons and a Gallery. I renamed the Text Inputs to NameText and ContactText. I gave the buttons some styling and called them ‘Clear Files’ and ‘Submit All for Approval’.
On the Contact and Name Text Inputs, set the Default property to User().Email and User().FullName respectively.
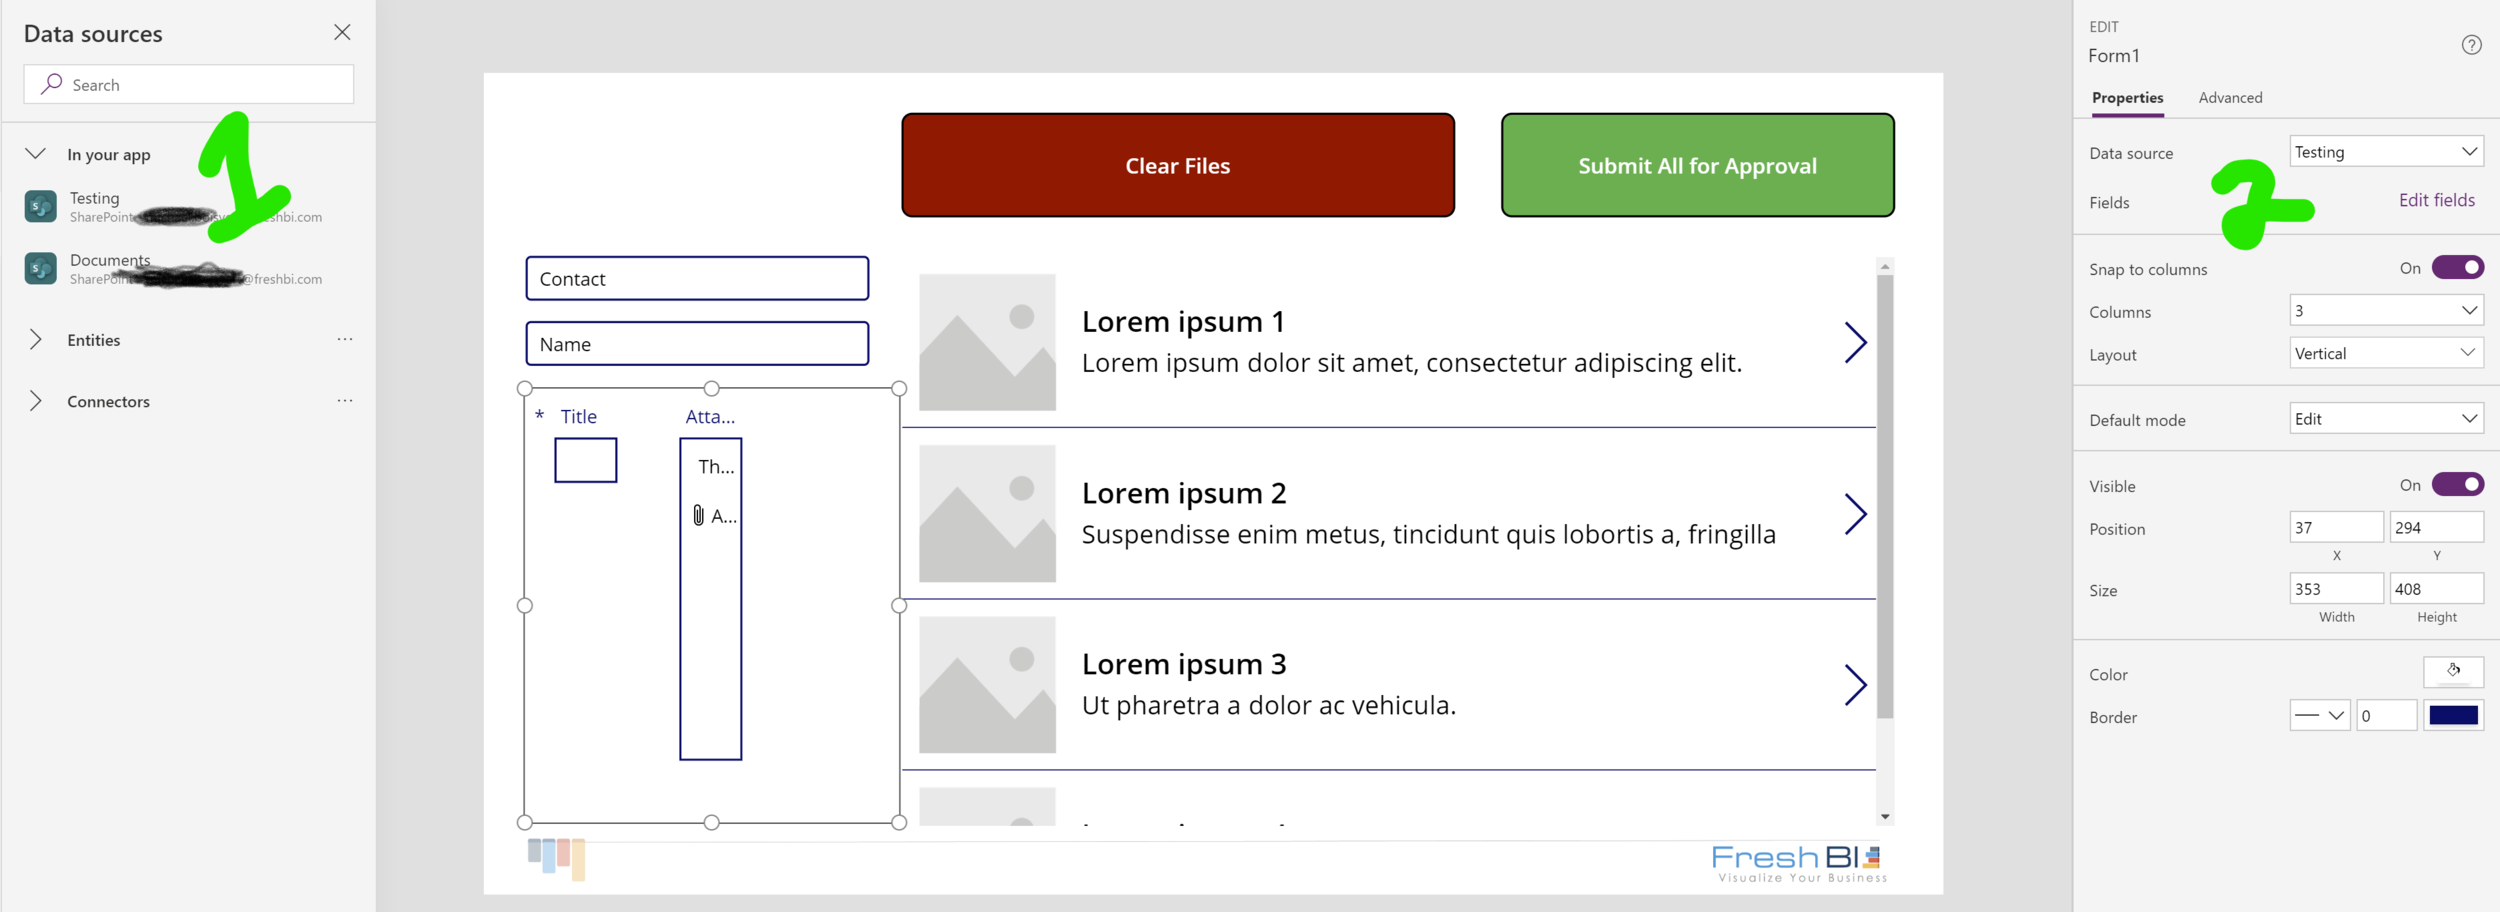
We need to add an easy file uploading object. The only way to get it is from another object, it’s actually contained INSIDE the Form object. You can get it from Insert -> Forms -> Edit. Click connect your data and attach ANY sharepoint list. Then choose that new data source from the Data Source dropdown in the edit pane of the new form. This will create a form with two items in it. We only want the ‘DataCardValue1’ . It’s a little tricky to do, so I’ve attached a video of someone doing an excellent job explaining it. You can find it Here>>. Once it’s extracted, rename it to ‘Attachment Control’.
We need to copy the attachment control out of the Form and and paste it to the main page.
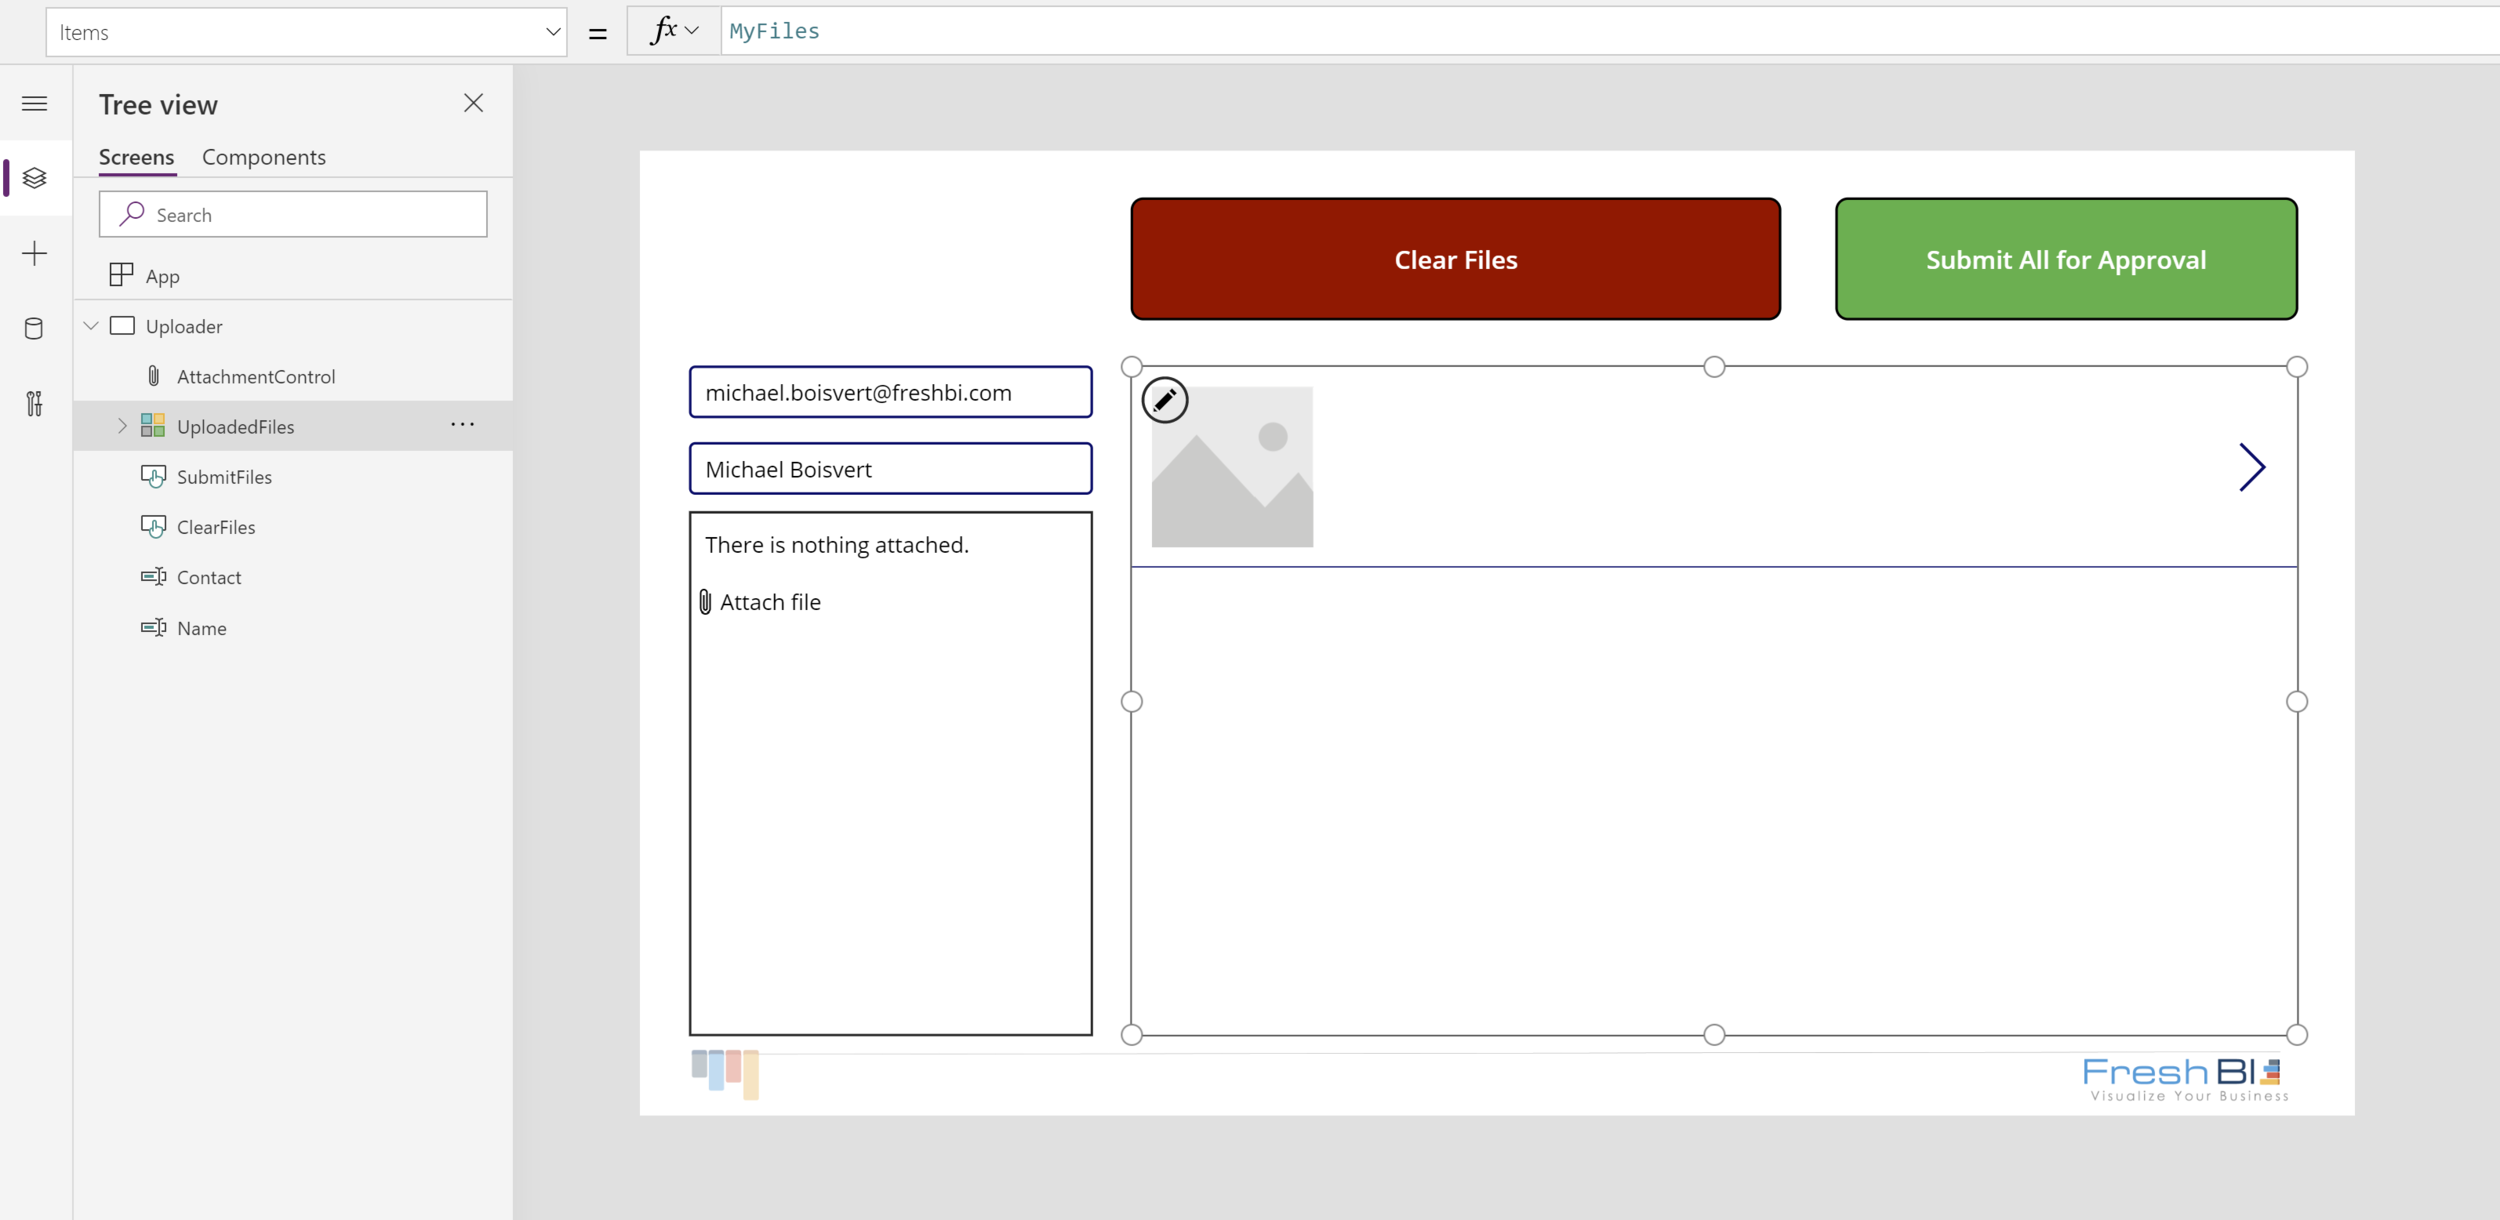
On the Attachment Control: Set the border color to Black, clear Items, ToolTip, and DisplayMode. Finally set the OnAddFile property to:
Collect(MyFiles, {Name: Last(AttachmentControl.Attachments).Name, File: Last(AttachmentControl.Attachments).Value, Uploader: NameText.Text, Time: Now(), Guid: GUID(), Contact: ContactText.Text } ); Reset(AttachmentControl)
When someone uploads a file, this adds to a collection called MyFiles with the name of the uploaded file name, the contents of said file, the values auto filled out in Name and Contact, a Guid and a timestamp. Finally it empties the attachment control.
Set the Items Property on the UploadedFiles Gallery to
MyFiles
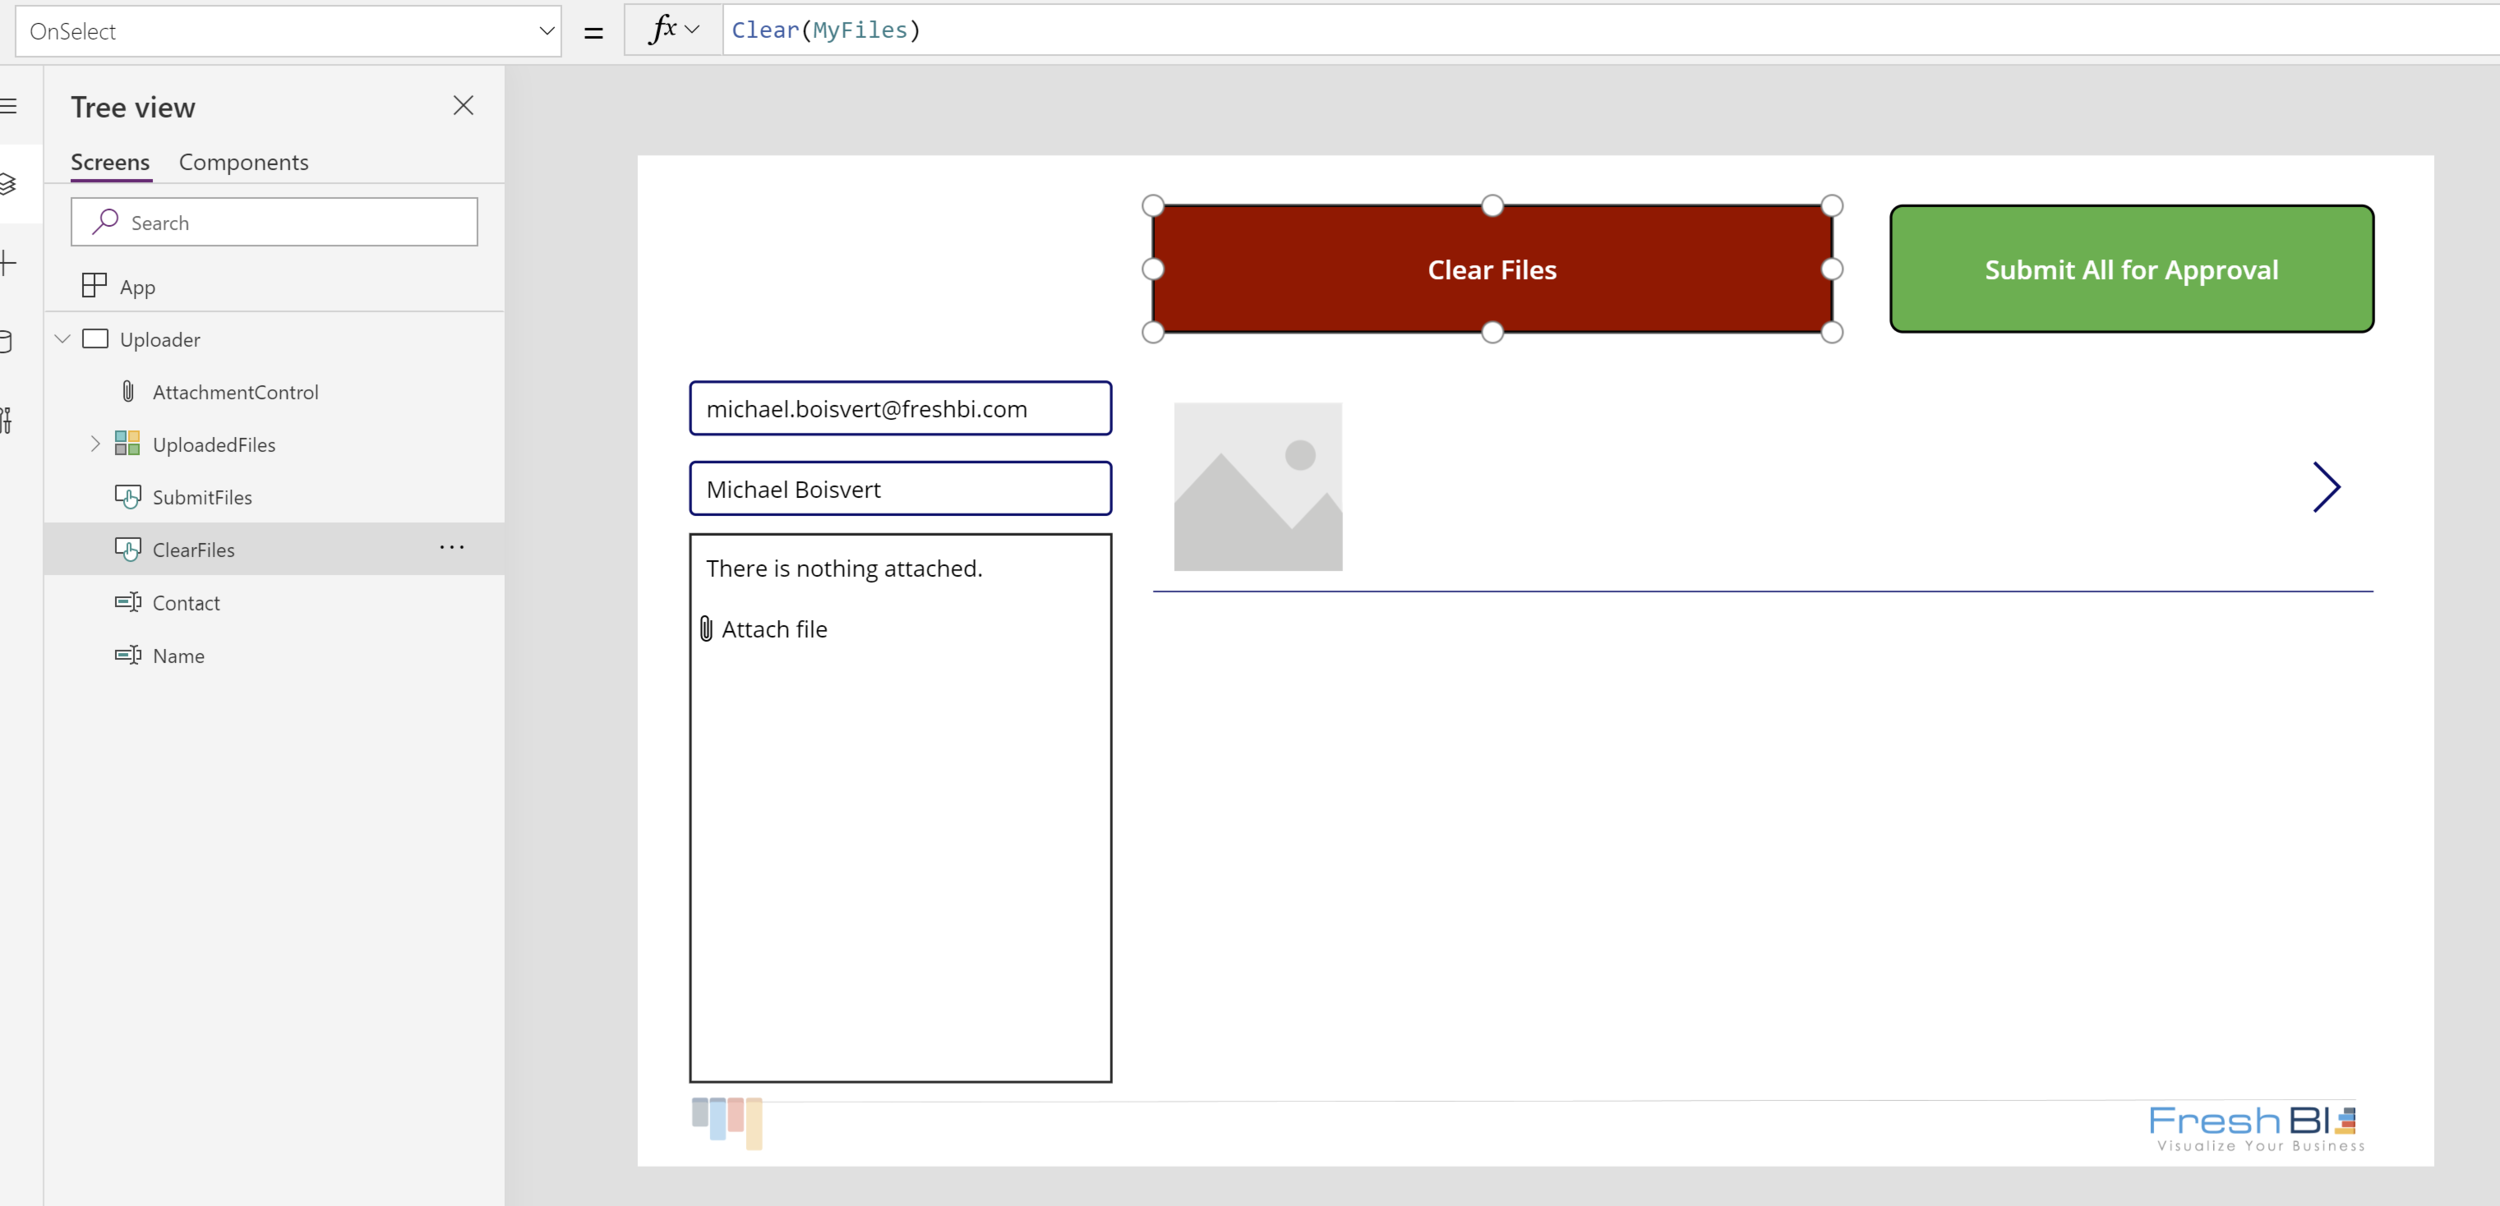
Set the parameter OnSelect for ‘Clear Files’ to:
Clear(MyFiles)
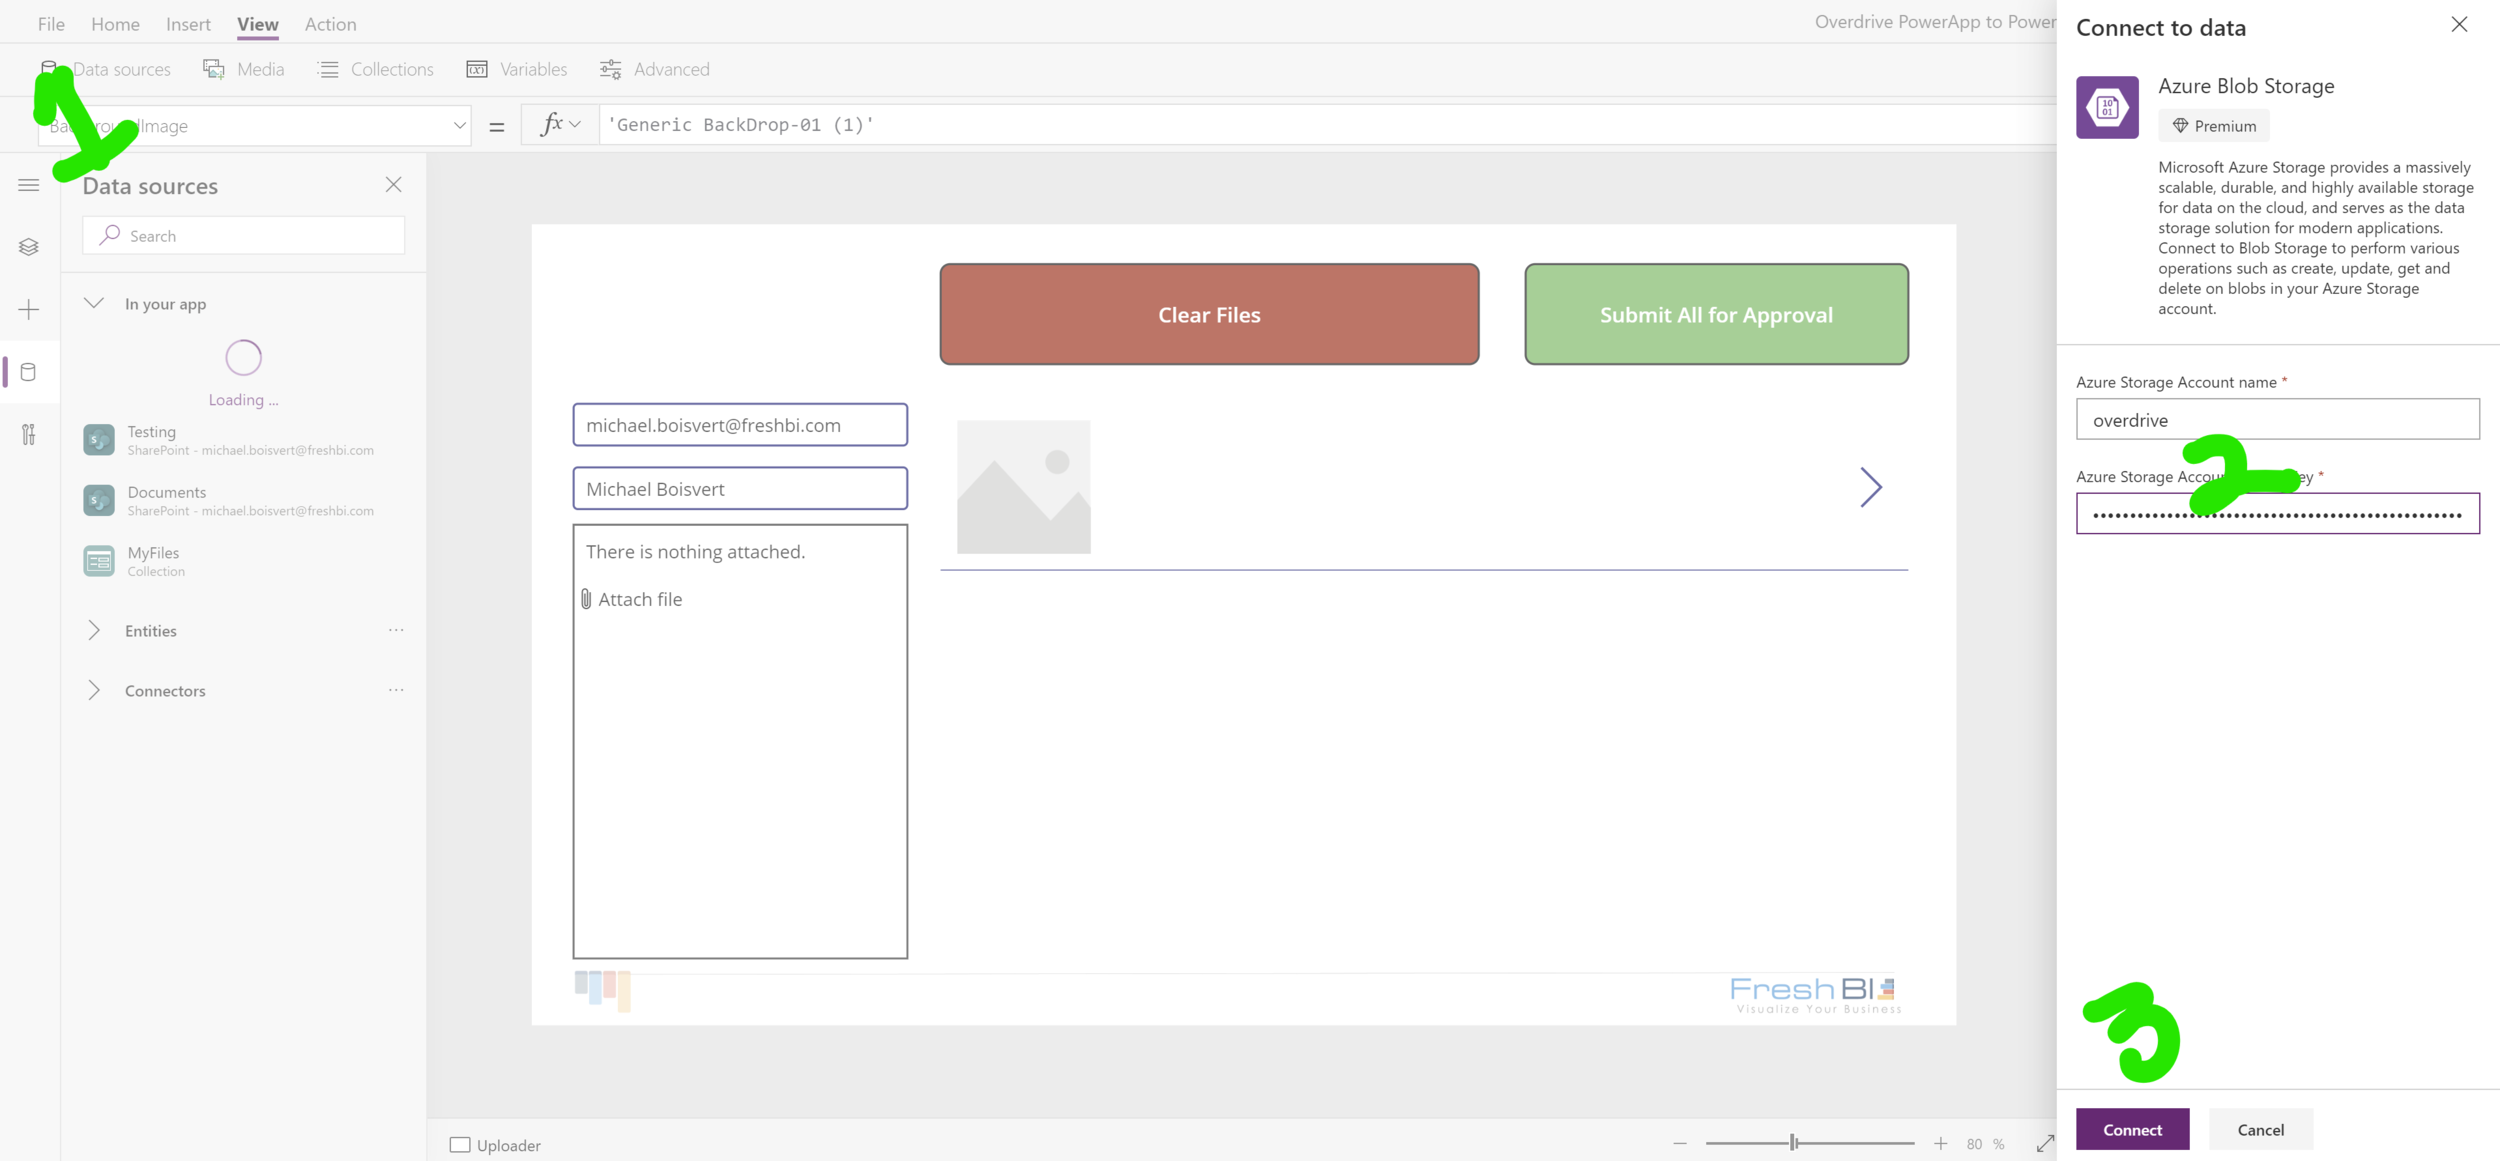
Add a new AzureBlobStorage at View -> DataSources -> Search for ‘Azure’. Connect it to overdrive and add the key.
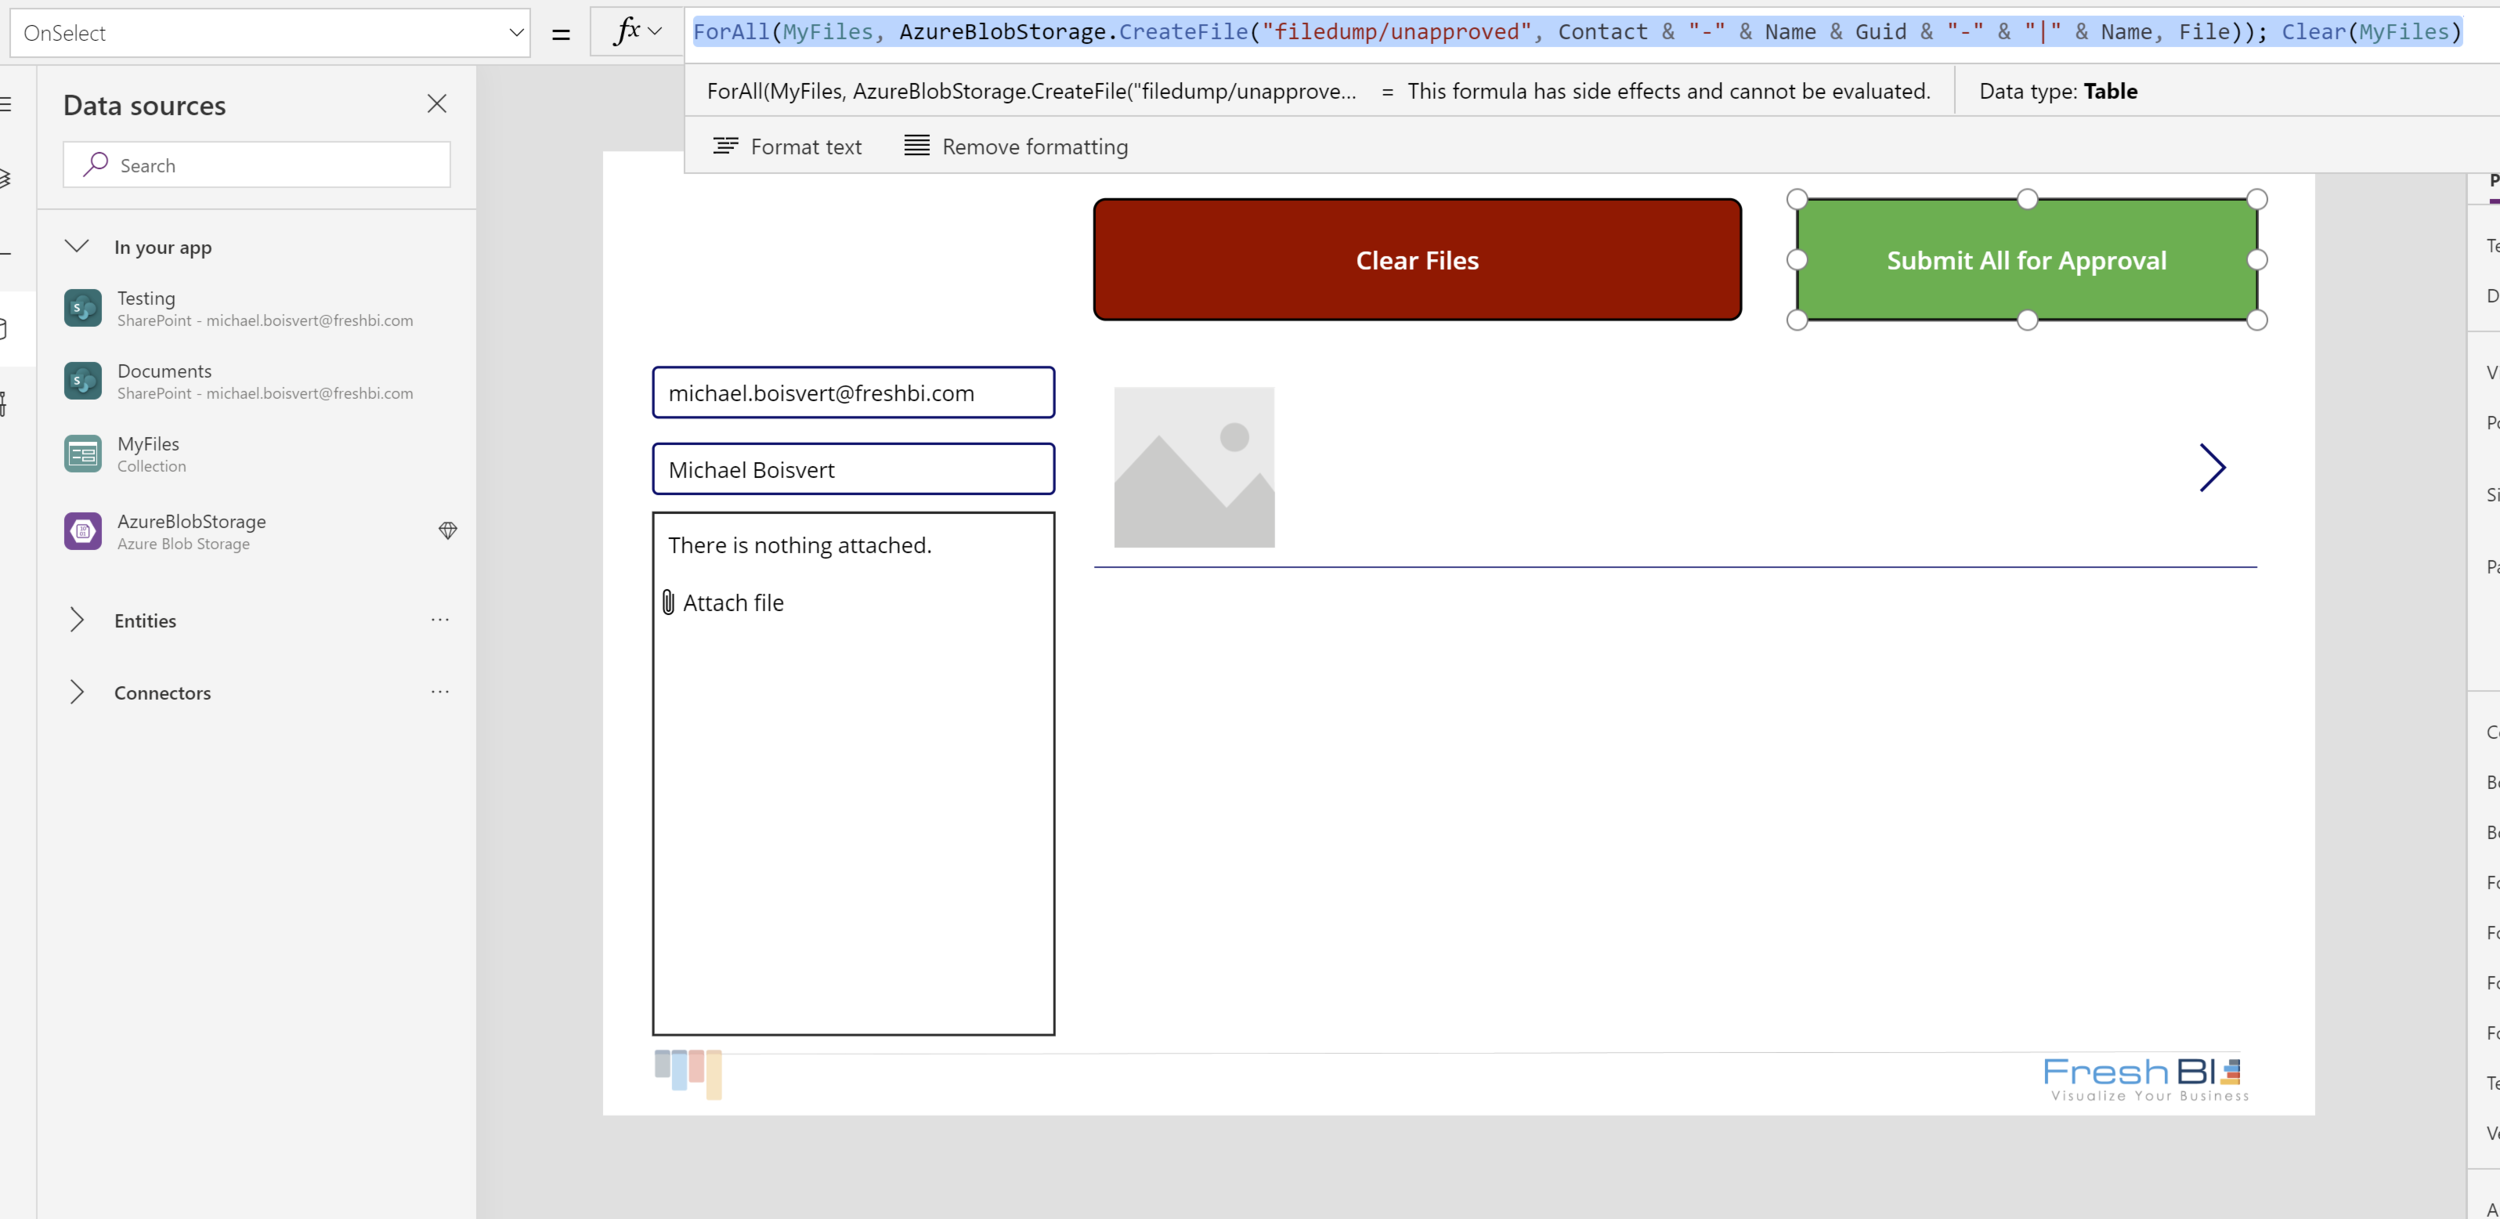
Set the parameter OnSelect for ‘Submit All for Approval’ to:
ForAll(MyFiles, AzureBlobStorage.CreateFile("filedump/unapproved", Contact & "-" & Uploader & “-” & Guid & "-" & "|" & Name, File)); Clear(MyFiles)
This says foreach item in the collection MyFiles, create a blob in the unapproved folder with a custom name. this ensures unique filenames and the contact info stays with the file. Another method might be adding metadata to the blob.
If you got this far, you can now upload files to blob storage! Horray! Let’s do some house cleaning. Set the Text on Title1 on the Uploaded Files to ThisItem.Name. Upload an Excel Icon Image and a BlankImage. Set the Image on Image1 to:
If(CountA(MyFiles.Name)> 0, 'ExcelImage.PNG', ‘BlankImage’)
Set Subtitle1 Text to “ “
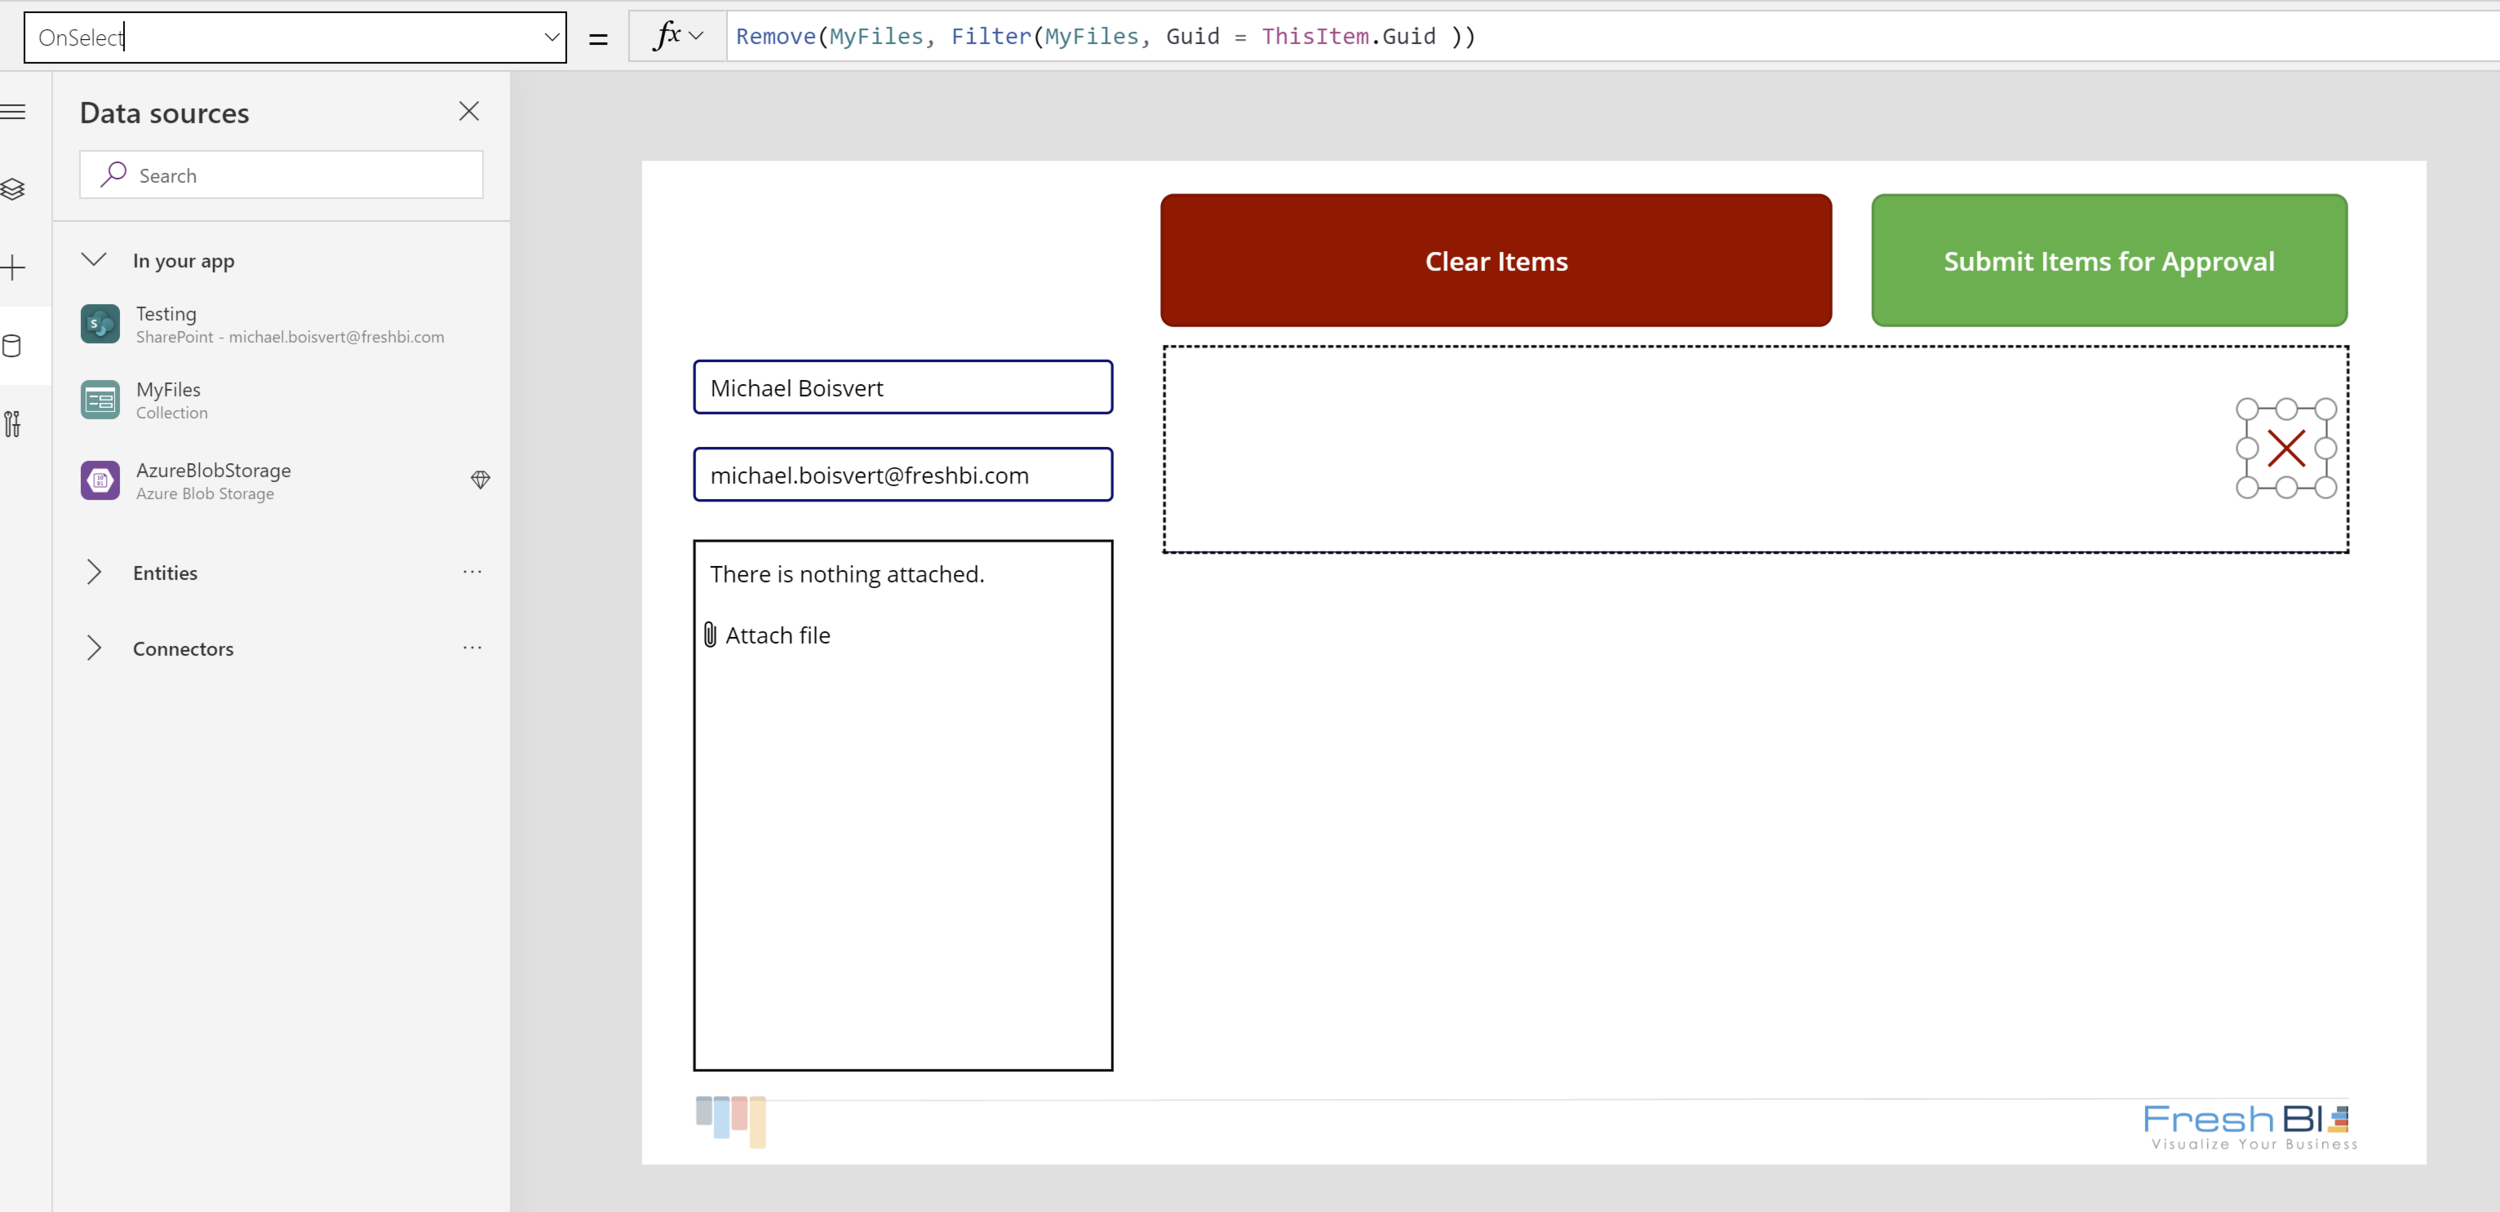
Set the OnSelect Property on the NextArrow1 to:
Remove(MyFiles, Filter(MyFiles, Guid = ThisItem.Guid ))
And set the Icon Red
Icon.Cancel
And that’s it for the PowerApp.


Closing Thoughts:
If we can make the Microsoft Stack work for us, we can save our analysts valuable time. When the reports create themselves and the data moves in a predictable manner we can allow our employees to maximize their time making human decisions. Let’s make the machines do the busy work, let the humans make complex decisions.
This example above is by no means comprehensive, but serves as the groundwork for a fully functional, cross stack, business logic application. Our intention is you can use this as a jumping off point to expand and customize for your business needs.
Our Latest Blogs


About FreshBI
Operating throughout USA and Canada, FreshBI is a boutique Microsoft Partner using Power BI to unlock the value trapped in your data so that your business can succeed.